Showing posts with label sewing. Show all posts

Wednesday, September 14, 2011

Bandana Dress

I am always looking for new things to make for my girls.  I found this darling dress made out of 2 bandanas and some ribbon.  Looks like this is a project for me!  It takes about 15 min, and the cost is around $3.
Tutorial can be found at

Friday, August 12, 2011

Ruffle Bag

Look at these darling bags made from a premade canvas bag and scraps of fabric.  So cute.  It seems pretty easy.   These bags can be found at Wal-Mart,
3 for $5.  What a bargain!  These would make great gifts.
Tutorial can be found at susieharrisblog.com
Another version, which I LOVE, found at thefoglemanfamily.blogspot.com.

Have a GREAT WEEKEND!!!

Monday, August 8, 2011

Upcycled Grocery Bag

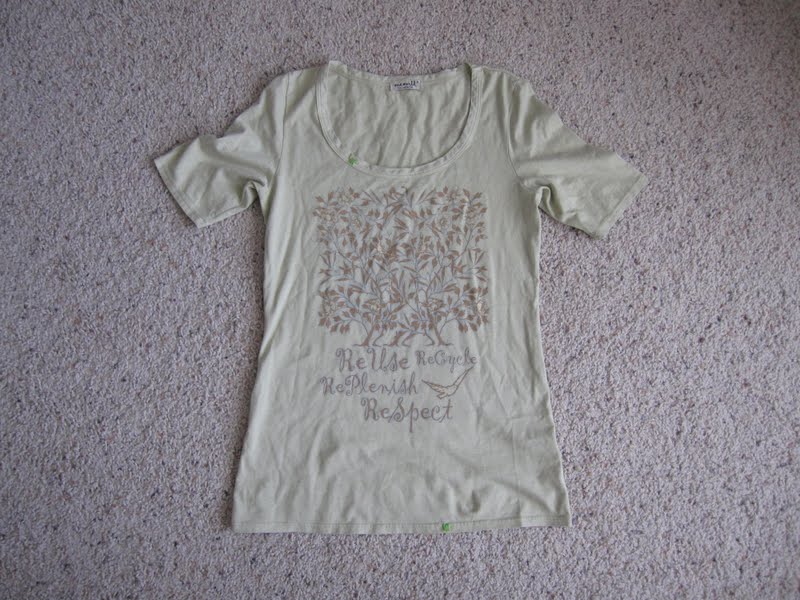
Start with a basic t-shirt.
Simply cut off the arms at the seams.
You can either leave the seams on or cut them off - it doesn't matter.
Next, cut the neckline off. 
See above pic.
Turn your t-shirt inside out and serge or sew the bottom (the part that is around your waist) together.
To square the bottom of the bag, bring the seams together and measure 1 1/2 in  from the corner.  Now draw a line across and serge or sew on that line to cut the corner off like this.
Now your ready to go shopping!

Monday, July 18, 2011

Another Skirt?

Look at this cute skirt that I found at
I love it.
I want to make some for my girls.
Football season is on its way and this would be so cute in UTAH RED!!!
Sorry, no blue here! 
Also look under her "things I've made" category for darling, new ideas.
I also found this tutorial for a hooded towel that I want to make.
So Cute!

Tuesday, June 7, 2011

100 Miles ON MY BIKE

Last Saturday I checked "riding my bike 100 miles" off my bucket list.
What a blast!
It was a 50's theme ride so we decided to make poodle skirts.
I found the easiest tutorial over at Made.
With lots of help I made 13 skirts: 4 black and 9 pink!
Here are my fun biking friends.

My friend, Karen, and her black skirt.
This tasty treat was found at all of the stops.
And now can be found in my pantry!
Oreos + Peanut Butter = Delish
55 miles - over half way there.

This table cracked me up with all of our essentials!
{This is totally an all girls ride}
Girly items, bug spray, sunscreen, and medication.  I think we are set!
Almost there- my bum is sure feeling it.
YAHOO!!!
We did it.  Thanks girls for such a fun ride.
I am so glad I did this and that I never have to do it again!!!
6 hours and 24 minutes on my bike is a long time. 

I learned a lot of things like...
New hand signals on a bike.
ALWAYS use sunscreen on your legs or you will get fried!
Drink a recovery drink (like Cytomax) or your legs will hurt.
HAVE FUN or you will not make it!
Our AWESOME Support Crew (aka MARV and DENISE) put this video together.
Rated pg for one mildly off color word.

Tuesday, May 31, 2011

Skirt Tutorial

E's teacher just had a baby girl so E wanted to make her baby a skirt.
I let her pick out the fabric and together we made her a little gift!
To start all you need is a 1/4 yard to 1 yard of fabric (depending on the length of your skirt), elastic, and we added a cordinating shirt!  We chose cotton fabric but this can be made with almost any kind.   
Choose the length that you want the skirt to be.  
We used the shirt as our guide because we didn't have a newborn to measure it to.
 
Using the whole width of the material (45 in) cut your
desired length like the above pic. 
Like a long rectangle.
I don't like to have any raw edges so we surged the edges.
If you don't have a surger just zig zag the edges.  This prevents any fraying once the material is washed. 
Fold your rectangle in half and sew the two sides together to form a side seam. 
Now, hem your skirt and sew your elastic casing. 
String your elastic throught the casing and sew it together.  Sew your casing closed and you are done!

We didn't stop there.  We added her name using my silhouette machine and freezer paper. 
E said that her teacher loved it!

The best thing about this skirt is that you can make it as simple or as detailed as you like.  I have seen pockets added, monograms, a second layer, ric rac, and the list goes on and on.  So easy and so fun.

Monday, May 16, 2011

Upcycled "Minnie" Skirt

A friend of mine gave us a huge bag of dresses.  We love hand-me-downs.
While trying on the dresses we found this one.  E didn't love it but
I loved the material...It was screaming "Minnie" skirt!
 First off I cut off the flowers at the bottom using the shape of the skirt.
Like this...
 After measuring the length that I wanted I cut off the top part of the skirt.
Like I did on the bottom.
 I then hemmed the bottom of the skirt.
 Next, I added wide elastic that fit E's waist measurement.
I pulled on the elastic as I sewed it so it gathered at the waist of the skirt.
 So easy and I loved how it turned out!
Look at those muscles!!!

I found this in Downtown Disney.  Isn't it so cute? 
Another project!

Tuesday, April 26, 2011

Zhu Zhu Clothes

My girls love accessorizing their Zhu Zhus.  I was having a hard time paying a lot for Zhu Zhu clothes so I found a way to make them.
Here are a few that I have made.
All you need is a sewing machine, scraps of fabric, and ponytail holders.
Use your Zuh Zuh as your guide to see how long/wide you want your clothes.
I surged aroung all 4 sides.  If you don't have a surger, zig zag the edges.
I don't like raw edges.  They fray.
Then I turned 3 sides so they were finished.
The 4th side is wrapped around the ponytail holder and sewn.
All done!
This is what it looks like under the Zuh Zuh!

Wednesday, March 23, 2011

Upcycled Shirt

I have found myself sewing a lot lately and wanted to show you my latest upcycle.  The Mr. loves to wear button up plaid shirts.  I grabbed on of his shirts after I was inspired when I found liliash.blogspot.com & her tutorial here. 
This girl is amazing.  I spent hours reading read her blog and love everything she does!

Tuesday, March 22, 2011

Knit Dress Tutorial

I found this dress from Shabby Apple and absolutely loved it but just couldn't bring myself to pay $86.  So, I headed to Downeast for some shirts to see if I could make my own!  I bought a shirt for $10 (could have spent less but I loved this one), and three camisoles in the biggest size they had.  I spent a
total of $21 and some change.
The first thing I did was wash all of the shirts, just in case they shrunk.  Then, I tried on the shirt and used a cami for the skirt.  Thanks E for taking my pic (don't mind that I have on a yellow shirt underneath.  I was too lazy to take it off).  I pinned where I wanted them to meet up like this...


 Then the fun part began...I cut off the bottom of the shirt (where I pinned it) and the top of the cami.
*I had to use three different colors of cami's because they didn't have three of the same color, but I love how it turned out.
 I measured how long my skirt was (20") and divided it by 4 (for 4 ruffles) so I would know how long to make my ruffles.  I actually made mine 6" so that they would overlap each other (and that was the max that I could do with the material I had).
 I sewed the shirt and skirt together.  Make sure you pull a little on the material or when you try it on the stitch will pop and you will have to sew it again!  Trust me, this is an important step.
Next, cut the ruffles out.  I did this twice (2 ruffles per cami).  I cut off the bottom to get rid of the hem.
*The ruffles below are 6" lengths by whatever the width  if the camis are.
Next I cut off the seams because I needed to piece them together to make them long enough to gather.  I also wanted all the seams to look the same.  You don't have to do this but I think it looks better.  
This gave me six pieces so I took three for each ruffle.  Then I sewed them together.
Like this...
Then, on one side of the band, I used my sewing machine like this to make a ruffle.  Don't hem the other end.  Knit will not fray! 
Then, mark out where you want the ruffle to go and sew each ruffle onto the skirt.
*Two things I learned...
1- Use chalk for your markings, and
2- Pull on your fabric while sewing your ruffles on or the seams will pop on you when you sit down!
 With the left over fabric make something for your hair!
Finished!!!